Workzones in SMART are used to track where work should be being completed. Workzones can be linked to your project schedules, enabling powerful productivity insights and real-time notifications when things might be going off-track.
Note
For best results, map out as many areas as possible. Creating zones for stockpiles, laydowns, and access points can help SMART give you better insights into how people & plant move around your project.
Creating Workzones #
To create a new work zone, click the ‘+ New’ button at the top left of the table. Fill in the details in the dialog.

To start drawing an area on the map, click the ‘Draw’ button. Click each point on the map in order to make a polygon shape. Press enter or click on the first point again to finish the area. Once the area has been drawn, press ‘Create’ to finish your new work zone.
Workzones can also be created through the drawing map tools.
Editing Workzones #
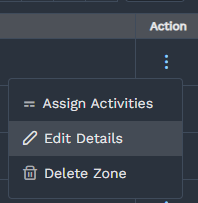
In the workzones table, select the ⋮ on the right hand side of the row you wish to edit, then click ‘Edit Details’.
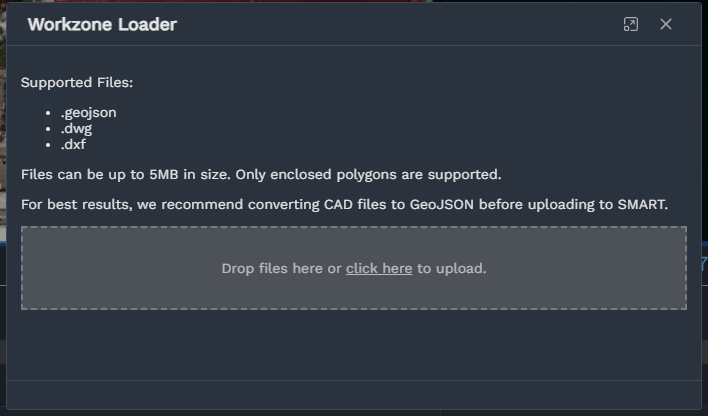
Uploading Workzones #
If you have a spatially referenced file or CAD diagram, you can import workzones from that. Select ‘⋮ Actions’ at the top right of the table and click ‘Upload File’.
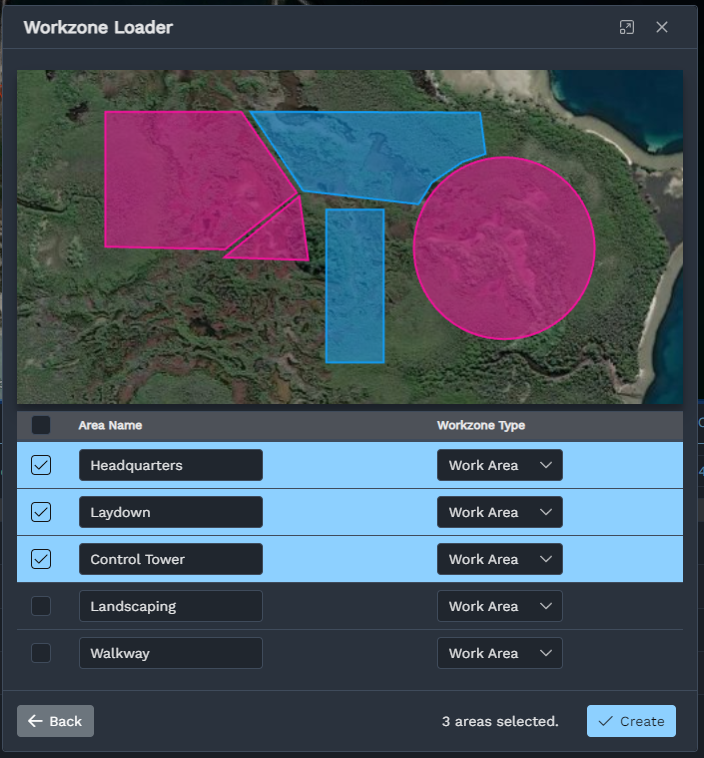
Once the file has been uploaded, select the areas you would like to import and click ‘Create’.
The Workzone File Uploader is currently in Beta. Some CAD files might have difficulty importing into SMART. If you encounter problems, please contact us for support.
Activity Assignment #
Workzones can be assigned to activities in your project schedule files. Similarly to editing a workzone, click the ⋮ on the right hand side of the row you wish to edit, then click ‘Assign Activities’.
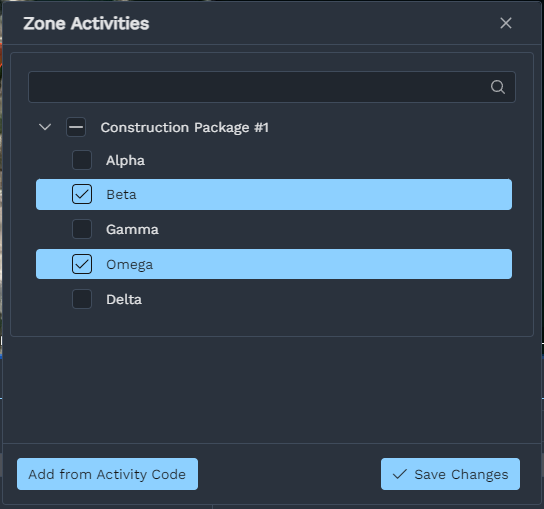
Select all activities which should be assigned to the zone, and press ‘Save Changes’.
Instead of selecting schedule activities manually, you can also add all activities with a certain activity code to a zone at once. Click ‘Add from Activity Code’ and select the activity code. All tasks matching this activity code will then be associated with the zone.
Workzone Types #
SMART comes with a few default workzone types for you to get started with. If you need to customise these, select ‘Actions’ at the top of the workzone table and then ‘Manage WZ Types’.
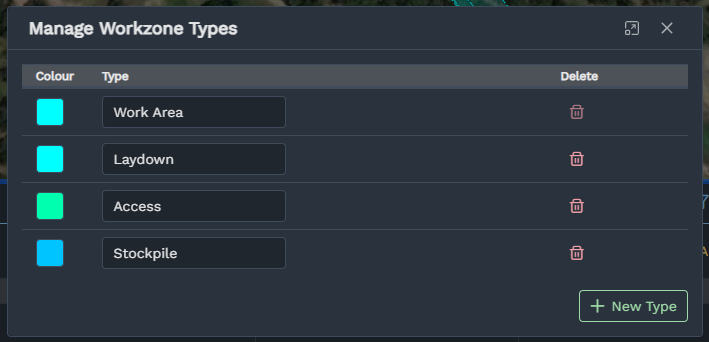
You can rename workzone types, or adjust the colour they are displayed with on the map.
Note
Workzones are designed for productivity tracking. If you want to mark out areas when resources are prohibited from entering (such as safety zones or heritage areas), you should instead create an Exclusion Zone and setup breach alerts.
Time-Phased Workzones #
Workzones can be set to time-phased – only active during a specified time window.
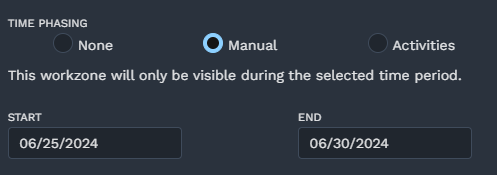
You can pick between the following options when editing a workzone:
- None: This workzone will always be displayed on the map.
- Manual: This workzone will only be displayed on the map during the range you specify.
- Activities: This workzone will only be active during the range of assigned activities. This workzone will only show up after the first task commences and before the final task finishes.
Nested Workzones #
For more complex projects, you can put workzones inside of other workzones. You might want to mark out broad regions corresponding to phases of the project, while still tracking individual work areas inside a region.
When creating or editing a workzone, you can select a ‘Parent Workzone’. The workzone is then treated as being a smaller part inside of the parent zone.
Click on the arrows next to a zone to expand it and see child zones.
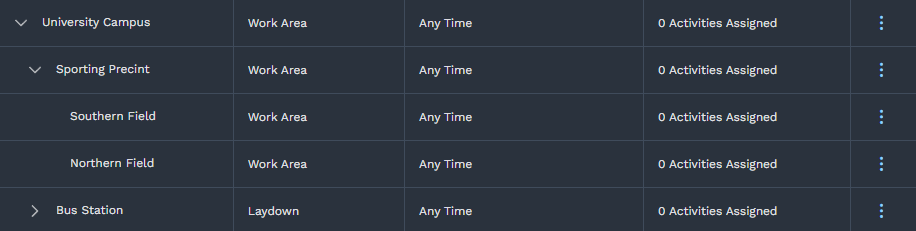
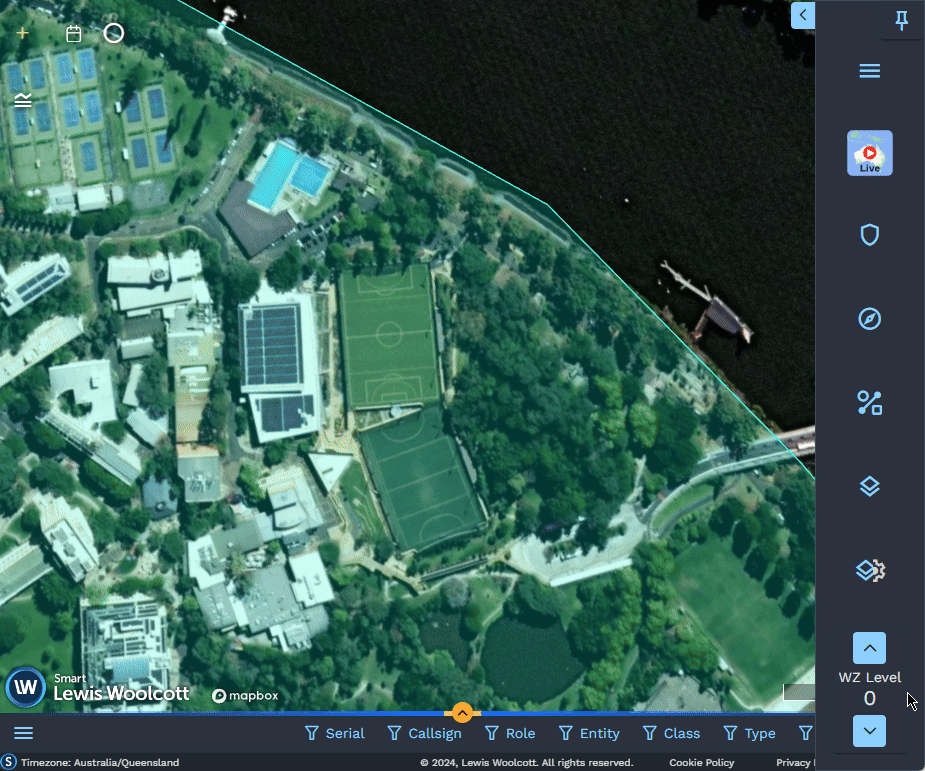
In the map tools menu, there is a ‘WZ Level’ selector. This allows you to adjust the map view between the high-level workzones, or the more detailed areas. Click on the ▲ button to ‘zoom out’, and the ▼ to ‘zoom in’.